Try the dress on your doll and coax the fabric in your running stitch down towards the waistband.
Make sure your seams match and that you are happy with the job so far.
Tack the bottom edge of the hem to prevent sliding, then sew the back centre seam (right sides) using a 3/8" seam. Back stitch a few times at the top since this point will get some wear and tear when dressing your doll.

BEST VIEWED with your browser at the 100% setting :)

Website Designed for Silkspike Dolls using HOMESTEAD software.
Please do not use my photos or any portion of my website without asking permission.
Thanks! Micki :)

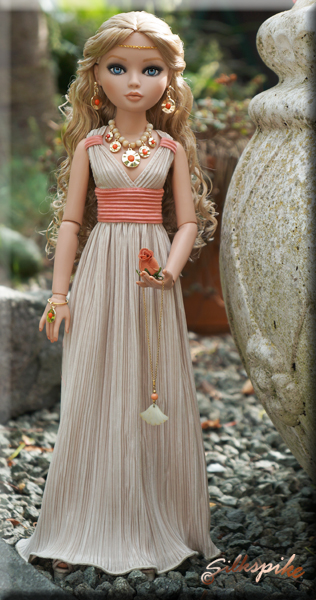
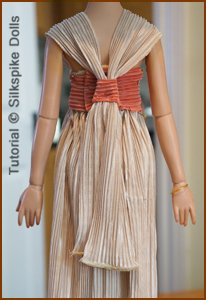
Grecian-Style Dress
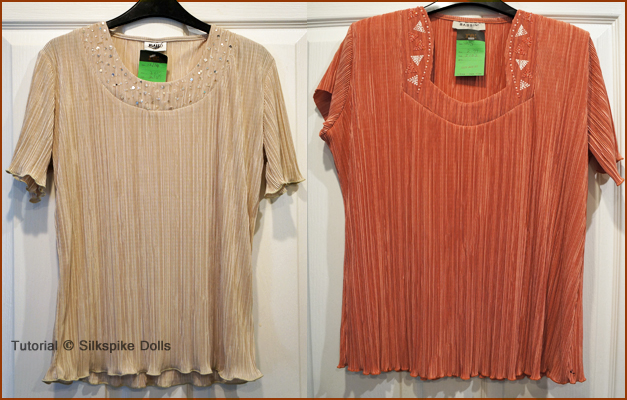
I have seen fabric similar to this in the fabric stores near me, but it is silky and the pleats are bigger/wider. These blouses are made from stretch fabric and the pleats are very tiny and close together. It was really easy to cut them up because they are rather out of fashion. The collar decorations were tacky-looking glued blobs, and the apricot one had shoulder pads. These blouses are cheap and plentiful in British charity shops and I've often wondered what it would be like to work with this fabric since the tiny pleats seemed the appropriate scale.
The reason the colours may be a bit different from one photo to the next is because I shot them during different times of the day or evening, and under different lighting conditions.
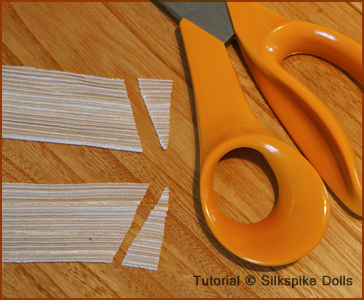
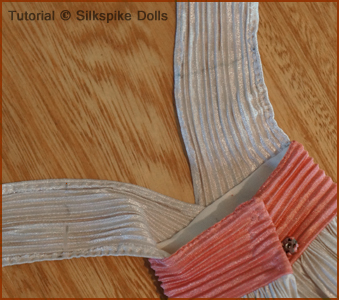
Deconstruct your blouse. This dress takes the entire front or back of the the blouse. I cut one large rectangle and two long, skinny rectangles from the ecru blouse to make the body of the dress. I cut vertical strips from the apricot blouse for the contrasting waistband and shoulder accents.
You may decide to make your dress differently, so I've included the steps I took to decide how I was going to make my dress. These instructions can be used for any fabric, although the accordion pleats lend themselves perfectly to this style.
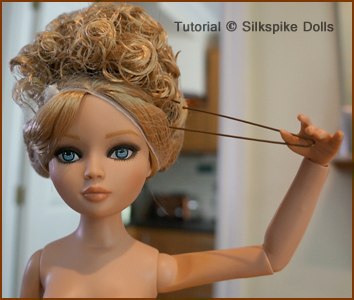
If you don't have a doll body or a doll who is bald or has short hair, you'll have to get those luscious locks out of the way. I find a hairnet and several hairpins work fine. This doesn't do any damage to curls or her existing style.
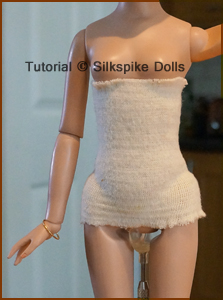
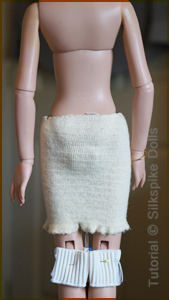
Next I slide a tube up the doll's body so I'll have a pinning surface. I have used a tubular stretch bandage (which is a bit thick) or you can try a small, thin sock or even a section cut out of the leg of a pair of tights.
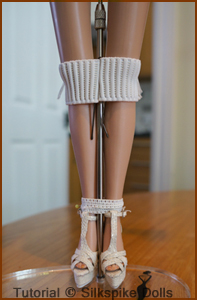
Put the doll in a pair of shoes because this helps her stand, and it helps you decide the dress length.
Next I strap the doll to a saddle stand by the knees and the ankles. This keeps her from sliding around or buckling at the knees as you drape fabric on her. You can use all the pins you'd like as long as you are careful not to scratch your doll. ;o)
I tucked the long strips that go over her breasts and over her shoulders into the bandage, then pinned the skirt at a height that gave me the length of hem I desired.
I played around with the back - wishing I'd made the bodice strips much longer. I tried a few different things with the shoulders and tried out a several variations of the waistband, and finally decided on the apricot waistband for a dash of colour..

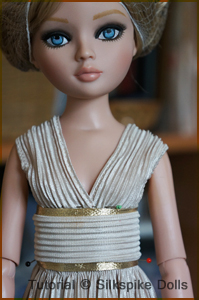
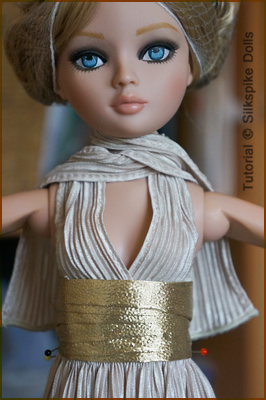
The solid colour would look very elegant, especially on a high-fashion resin doll. I liked the flash of gold, but it looked fussy and I didn't want it to interfere with the necklace I had planned. I like the possibilities of the idea in the far right photo as well.
You can make this dress for any doll - See views of this dress on other dolls such as JamieShow, Tyler and Antoinette here --->

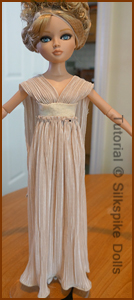
Ta Da!!!
You are getting close to finishing your dress!
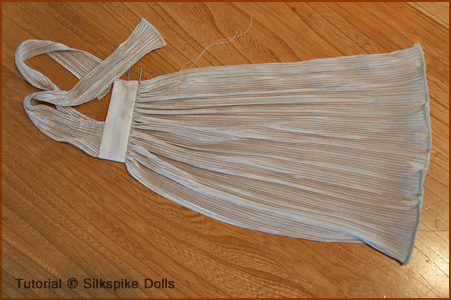

Take a look at the Broomstick Skirt Tutorial to show you how to gather the skirt section of your dress, then you will be ready for the next steps here.
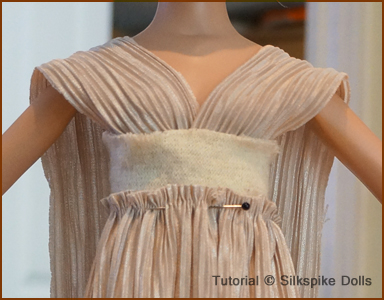
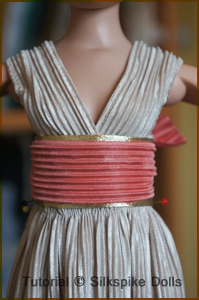
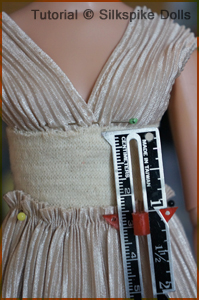
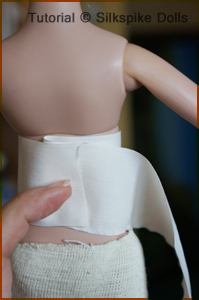
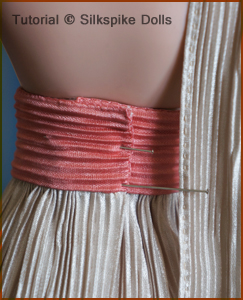
MAKING THE WAISTBAND: I opted for a wide waistband for this dress which gives it a lovely shape on any doll. Measure from below the bust to where you would like the top of your skirt to start. Mine was one inch PLUS a quarter inch for the seam at the top and another quarter inch for the seam at the bottom. That made my waistband an inch and a half wide. This measurement seems fine for most 16" dolls, although dolls with very small waists might require a bit of shaping of the waistband at the back seam. To get the length of the waistband, slide your tube down the doll and put your cloth up to the doll as shown and cut. Be generous because you can always trim some off if needed.
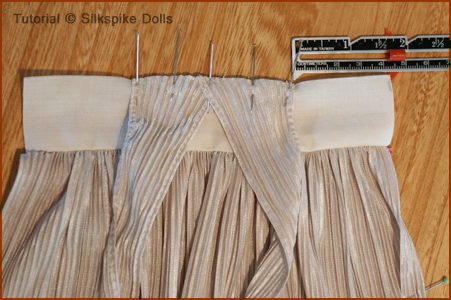
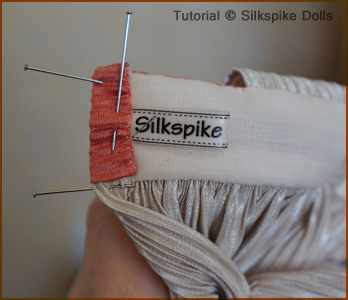
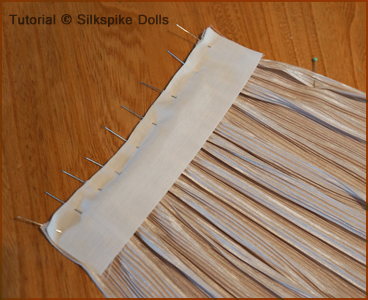
ATTACHING THE WAISTBAND: Pin your lining to the skirt -right side of the waistband to the wrong side of the skirt. In the above example it isn't obvious, but positioning is important if you are using fabric with an obvious right and wrong side. I opted to tack/baste at this point - it is BEST to use a backstitch for this step because the gathers are prone to shifting if you just use a running stitch.
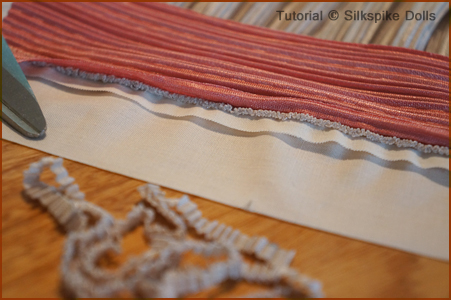
Iron your waistband fabric and cut it the same size as your lining. This will be the only ironing you have to do on this project. Don't worry if it isn't ironed completely flat - you just want the pleats to spread out a bit to make it easier to work with.
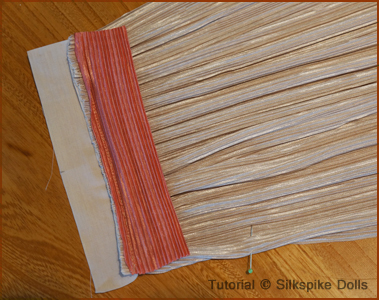
Next, flip it over and pin the waistline you cut from your main fabric to the other side and either machine sew or hand stitch it to encase the raw edge of your gathering. It will be rather thick, so it's best to trim the middle layer closer to the stitching. Do not sew these pieces together at the top yet. You are now ready to attach your bodice to the waistband.
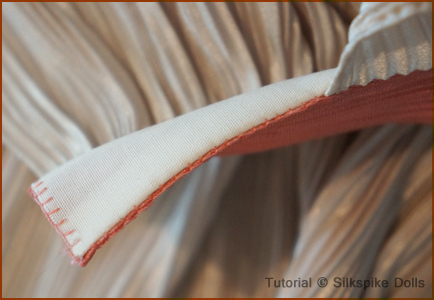
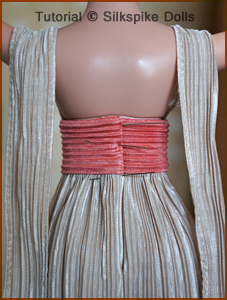
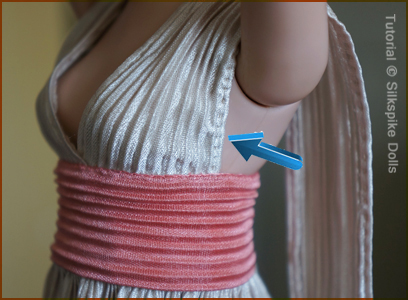
ATTACHING THE BODICE: Pin the bodice as shown in the photo to your right. The woven lining goes against the doll, so you will be sewing the back sides together. Be sure to measure carefully at both sides to insure your bodice is exactly in the middle of the waistband. Making sure the right side of the waistband is flipped down, out of the way, sew across both layers (the woven lining and the bodice strips) using a 1/4" seam. Flip the right side of the bodice upwards as you see in the photo to your bottom left.
Fold the tops of the waist pieces 1/4" towards each other (which encases the raw edges on the bodice). I didn't turn under the centre back edges - I left them flat and sewed a blanket stitch to hold them together. Use an overcast or blanket stitch sew the tops of the waistband together. This stitch runs across the front of the bodice. Try to keep your stitches tiny and uniform.
The back seam opening (to your left looking at the doll's back) should be flipped inwards by 3/8" and tacked down to the dress. I didn't turn the right side inwards, opting to keep it flat. I used two snap sets for the waistband which I made snug so it won't easily slide down the doll's plastic body.
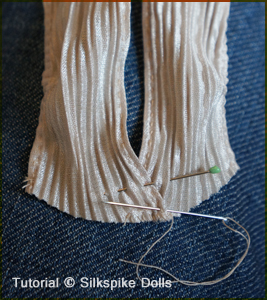
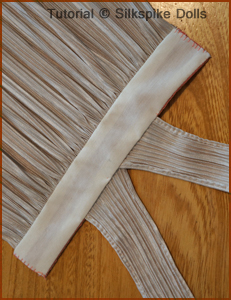
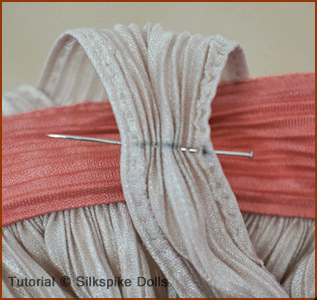
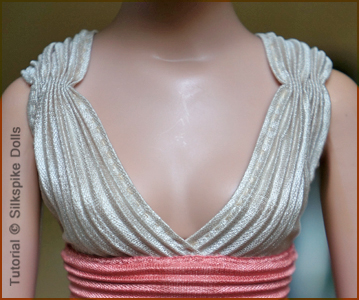
To make the gathers at the shoulders, pin the gathers as shown. Remove the dress from the doll and mark where you will gather. It will probably be at a slight angle. Make sure both sides match.
Gather the line by hand and tie off the ends. Try the dress on the doll again to make sure you are happy with the way it looks so far.
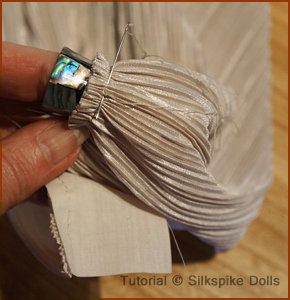
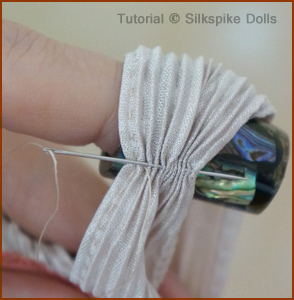
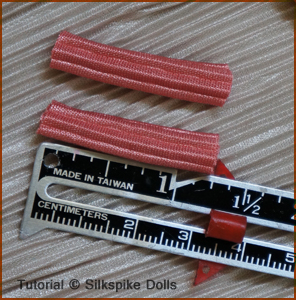
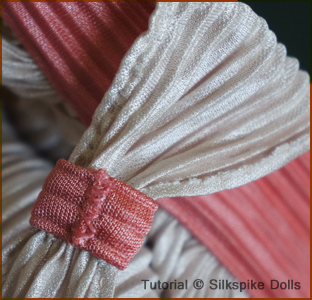
Make a tube at least 4 or 5" long and turn it using a safety pin or a loop turner. Then cut to size. You can see mine were cut at 1-1/4" long. I wrapped the tube around the strap and carefully spliced the raw edges together without catching the thread on the body of the dress. This way you can slide it up and down to get the desired fit. Once you are happy with the position, you can tack them to the dress strap if you would like.
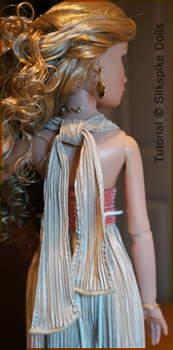
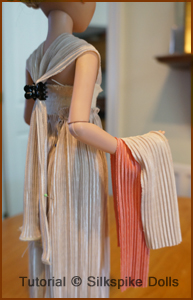
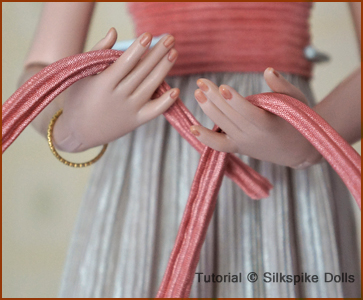
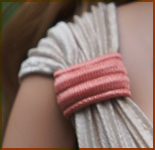
FINISHING THE BACK: You can let the strap hang loose in the back, tie it at the back of the neck in a loose square knot (halter style) or twist it several times down the middle of the back and clip it to the back waistband - whatever you like the best!
CUTTING THE FABRIC: I cut one large rectangle and two long, skinny rectangles from the ecru blouse to make the body of the dress. I cut vertical strips from the apricot blouse for the contrasting waistband and shoulder accents. The width and length of the strips of cloth that make up the bodice depend on the size of the doll and how long you want your straps to hang down the back of the dress.
RECOMMENDED: This fabric has four-way stretch. Ball point pins work best, as well as a very small/sharp needle for hand-stitching. I found it was best to put a brand-new needle on my sewing machine designed for stretch fabrics.
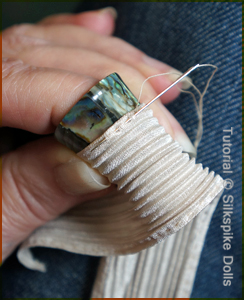
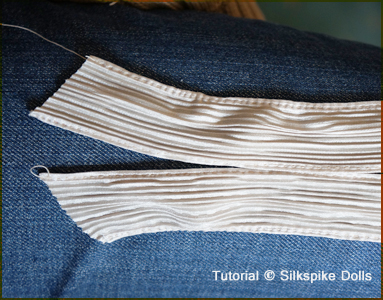
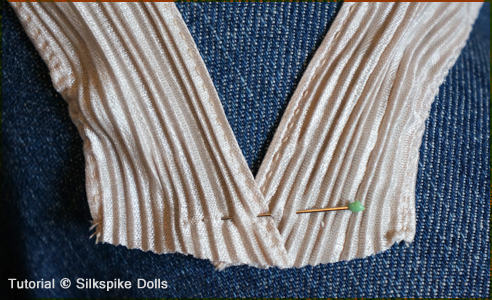
MAKING THE BODICE: I held the strips up to the doll's bustline and guesstimated the angle of the cut. I turned under once and stitched a running stitch down both sides of the strips to give them a finished edge. I SLIGHTLY ruched the side that points outwards to the armpits. This gives it just a bit of shape so it doesn't gap open at the sides. I then tried it on the doll again and pinned the overlap - then tacked the two sides together. It is now finished and ready to sew to the waistband.

You can make this dress for any doll - See views of this dress on other dolls such as JamieShow, Tyler and Antoinette here --->
OK - Let's start sewing!
*
*
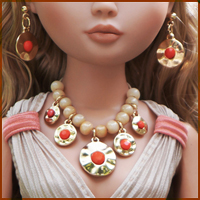
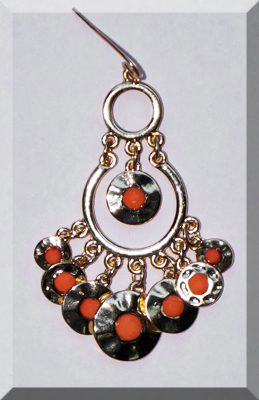
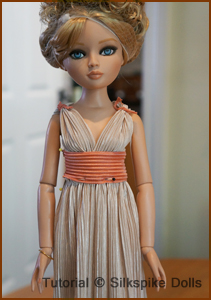
FINISHING TOUCHES: The necklace and earrings were made from a human earring that I bought on sale for a pound. It only took one earring to make the necklace and earrings for the doll. I had one little dangly left over, as well as the metal loops. I can use them for another project. The ecru beads are glass beads taken from an old necklace. It is worth the time and effort to source materials and buy a few small jeweler's tools to make your dolls fabulous jewelry that really adds to the outfit.
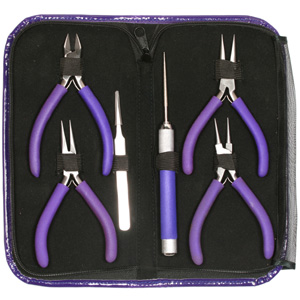
SUGGESTED TOOLS
FOR MAKING JEWELRY