
You may find a source for this fabric, but I found these blouses at a charity shop. It was really easy to cut them up because they are quite out of fashion (in my opinion) and the collar details are tacky-looking glued blobs. These blouses are cheap and plentiful in British chairty shops and I've often wondered what it would be like to work with this fabric since the tiny pleats seemed the appropriate scale.
I shot the photos during different times of the day or evening, under different lighting conditions, so that is why the colours may appear different from one photo to the next.
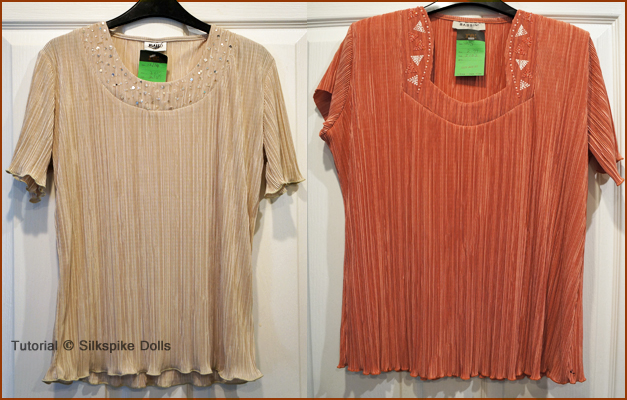
I found this fabric fun to work with even though my machine isn't designed to sew stretchy knits. It has a four-way stretch, so I hand-stitched the parts I thought would make my machine freak-out.
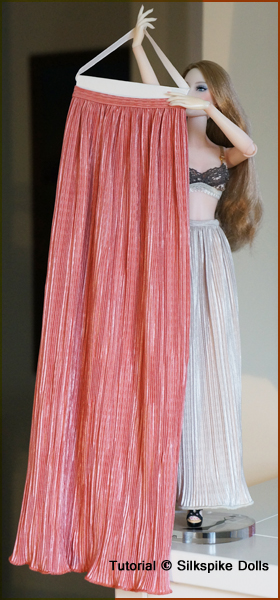
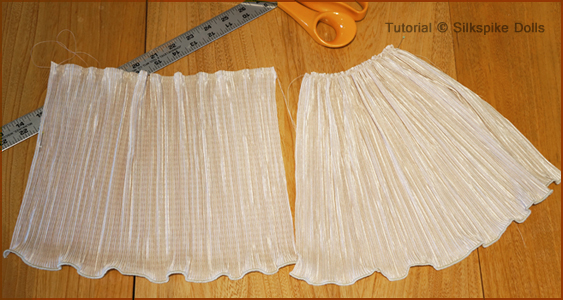
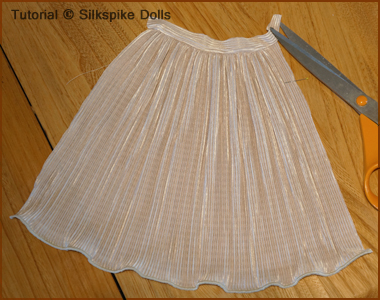
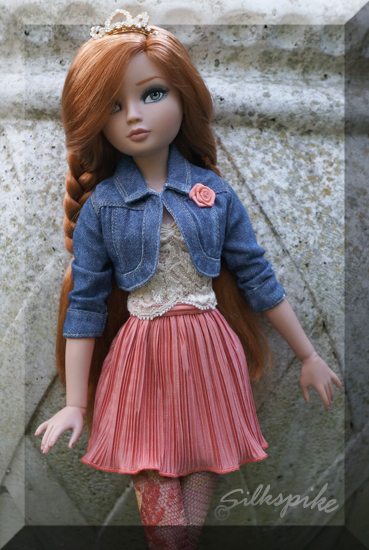
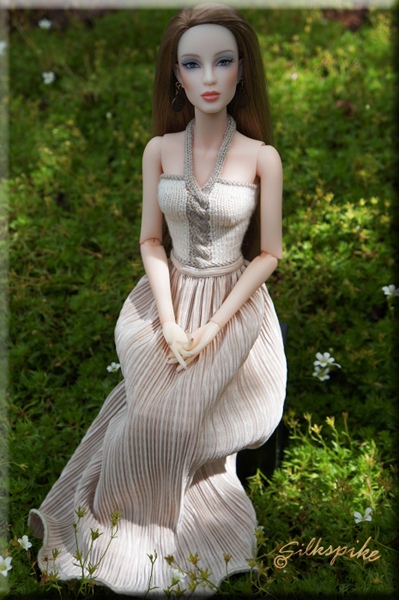
There is enough fabric in each shirt to make at least four skirts or dresses utilizing the existing hems. The short skirt (above shown on Ellowyne) was made with one sleeve. The longer skirts (shown on JamieShow Grace) require either the entire front or back of the blouse. The larger skirt in the photo to your right is made for my friend's Ipelhouse doll. I don't have access to the doll, so I had to make that skirt strictly from her measurements.
It is advisable to use a fresh ball-point needle for your sewing machine and use ball point pins if you have them available. I used a very fine needle to do the hand-stitiching. A larger needle isn't ideal for use on this fabric. Do not iron this fabric except when indicated in the instructions.

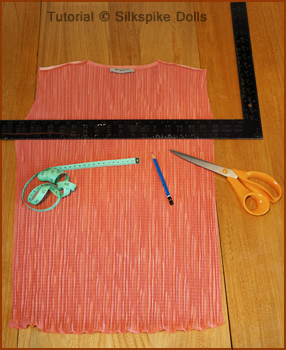
Deconstruct the blouse by cutting the sleeves off at the seams, then cut apart the fronts and the backs. If you decide to use a sleeve to make the shorter skirt, cut along the sleeve seam and flatten it out. My skirt used the entire width of the sleeve, so I cut away the curved part at the top, leaving only the rectangular shape. If you decide to make the longer skirt, use the front or back of the blouse and cut carefully along one of the accordion lines on each side so you get a nice rectangular shape.
Decide how long your skirt will be, then measure and mark the length, adding 1/4" to your total length. I drew my line all the way across the blouse to get a good, straight line. Do not be tempted to add a bit extra because all of these skirts seemed to grow a tiny bit longer as I worked with them.
After you cut your rectangle, fold it together lengthwise and double check that both sides are exactly the same length. Cut your waistband about an inch longer than your doll's waist. Iron it flat as possible. This is the only ironing you will have to do.
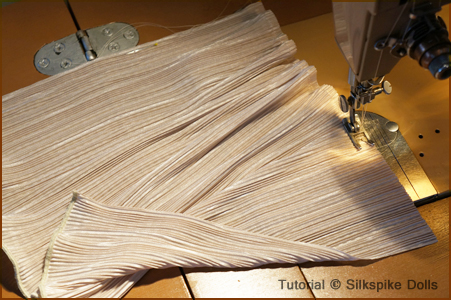
I sewed the gathering stitch 1/4" from the edge using my machine, but it would be easy to do this by hand. Do not stretch the fabric as you sew. I found that it is better to sew this stitch slowly so you can control the fabric. Do some test stitching on a scrap.
I sewed only one gathering stitch, rather than the usual double line of gathering stitches that I normally sew. One seems to work fine. I set my machine at 6 stitches per inch for this step. You will love the way this fabric gathers!
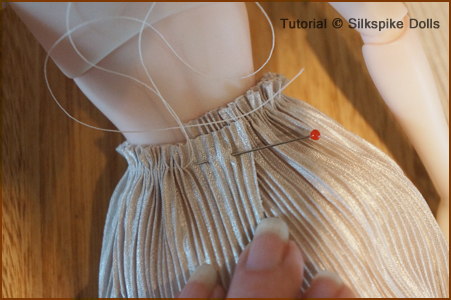
Use your doll to figure out how big around the waist should be and tie off your gathering stitches with several well-tied knots. You will be working with this section a lot and the last thing you want is for your gathering to come loose! As you can see, I left a bit of the fabric ungathered at both sides so they can be turned under. Lay your skirt out flat and fuss around a bit with the gathers to make sure they are uniform. If you are making the skirt for a doll you do not own, measure carefully along-side a flat ruler or tape measure.
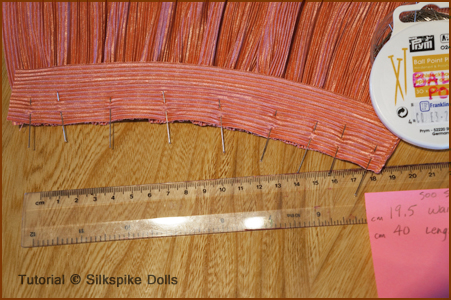
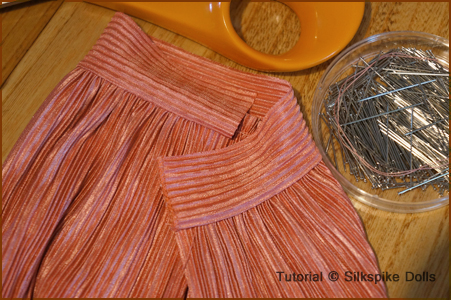
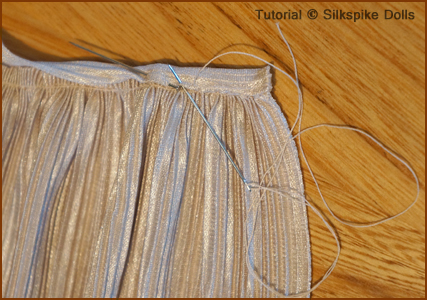
Trim any excess off your waistband. Pin the waistband to the skirt right sides together. At this point, I tacked the waistband to the skirt right along the gathering stitch. Use a back-stitch because if you don't, the fabric will shift.
After I tacked the two pieces together with the back-stitch, I machine-stitched carefully along the basting stitch. Your skirt should look similar to the above photo to your far right. At this point, you are half-way there!

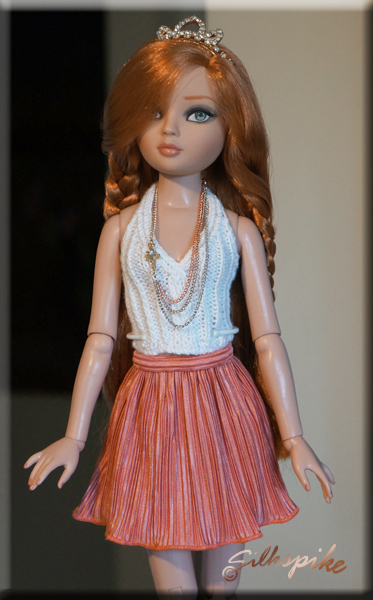
You can now have some fun styling your doll in her new skirt!
Broomstick Skirt
BEST VIEWED with your browser at the 100% setting :)

Website Designed for Silkspike Dolls using HOMESTEAD software.
Please do not use my photos or any portion of my website without asking permission.
Thanks! Micki :)
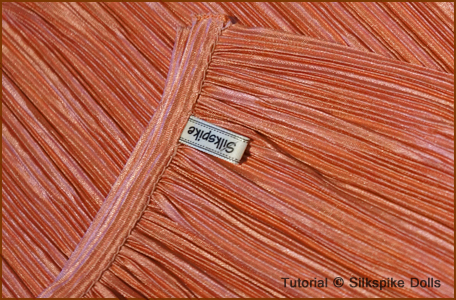
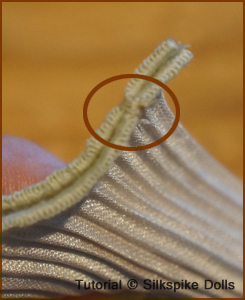
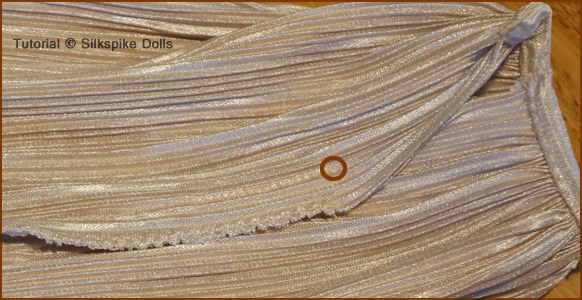
Turn the waistband under and hand-stitch the wrong side. I wouldn't recommend trying to top-stitch the waistband. If you have a label, you can sew it into the waistband or the back seam. It's best if you put a little anchor stitch at the bottom hem so your pieces won't shift or slide when you machine stitch the back seam. Try the skirt on the doll and pin it together below her rear end and test to see if you need to pin it lower. Sew the back seam downwards toward the hem. Be sure to backstitch few stitches before starting the s. You may have to (very) gently pull the top and bottom as you sew.
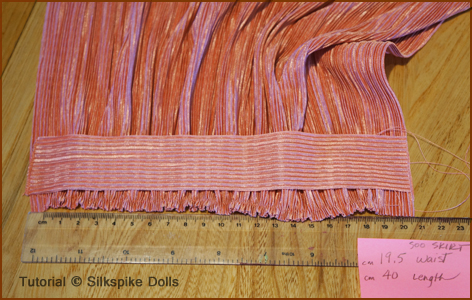
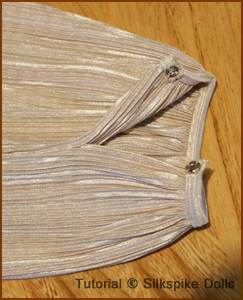
The back seam is 3/8", so there is a little extra to turn under. Finishing the back seam is optional. I did with the ecru skirt and didn't with the apricot skirt. Sew on your snaps with the left back overlapping the right.
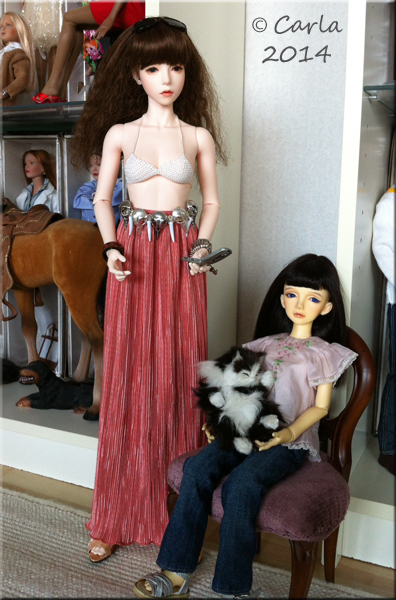

Skirt shown on SOO by Ipelhouse
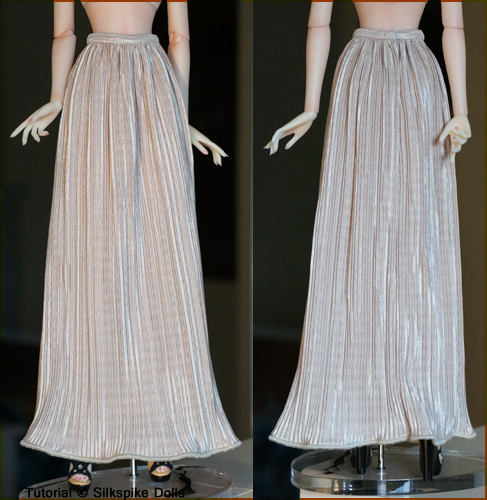
Skirt shown on GRACE by JamieShow
Ellowyne Wilde