


Add a Mock Cuff
to your
Dolly Sleeves
This is a companion tutorial for a sewing pattern I made for Ellowyne Wilde who is 16" tall. I sell this Housecoat Pattern on Etsy. If you are interested in taking a look, please click.
How to Sew a Mock Cuff
This tutorial will work with any size sleeve - just cut the rectangle to match the bottom part of the sleeve, but slightly wider, leaving about 1/8" over on both sides
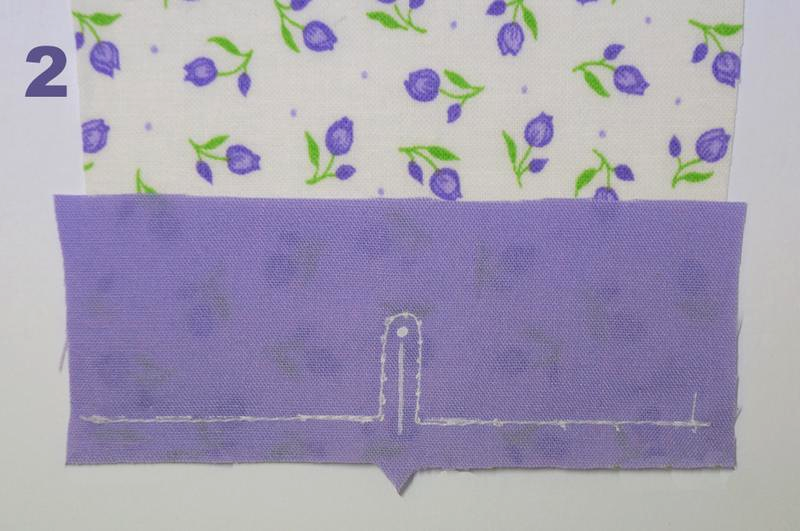
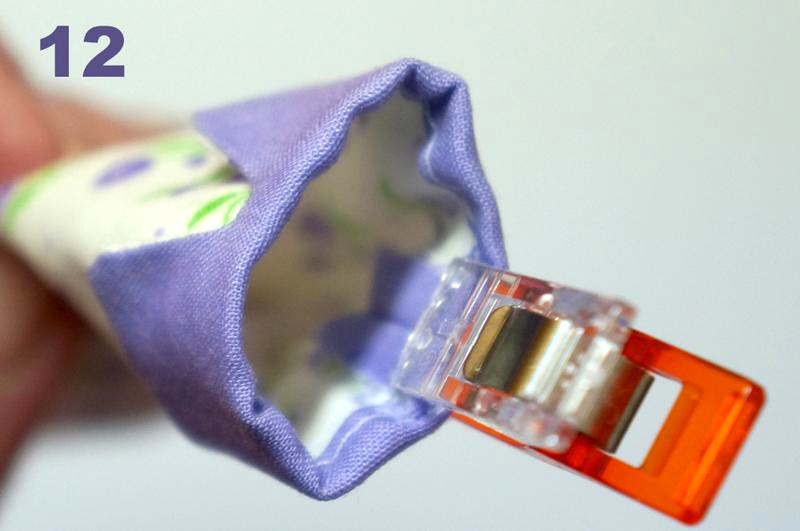
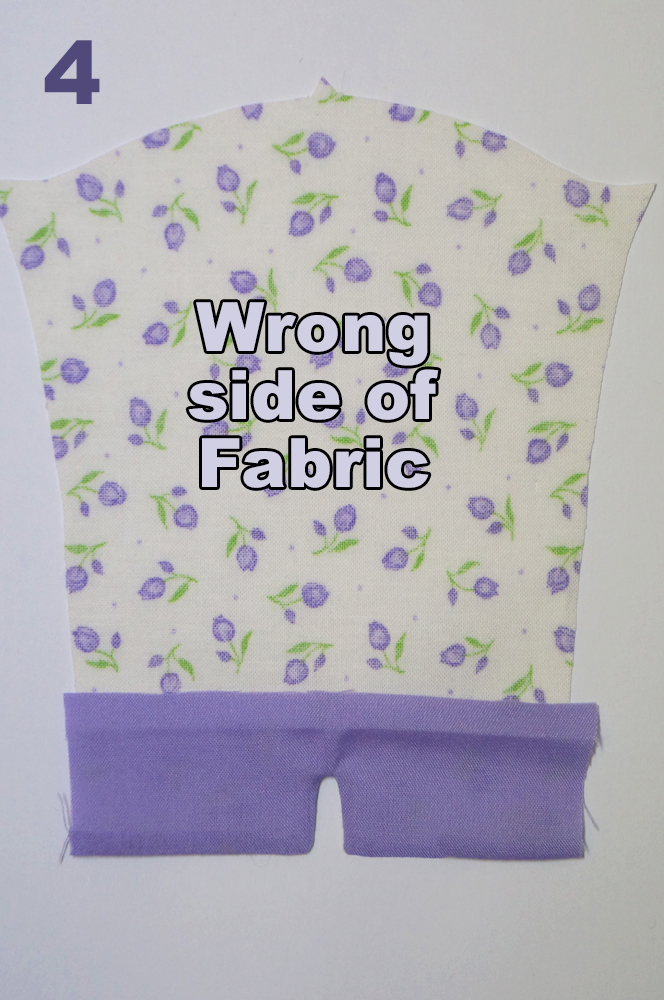
Photo 4: This is how your piece will look after the cuff has been turned and coaxed into shape. I labelled the pieces right and wrong side so you can check your piece against the photos. Press the cuff. Also turn down a narrow hem as shown.
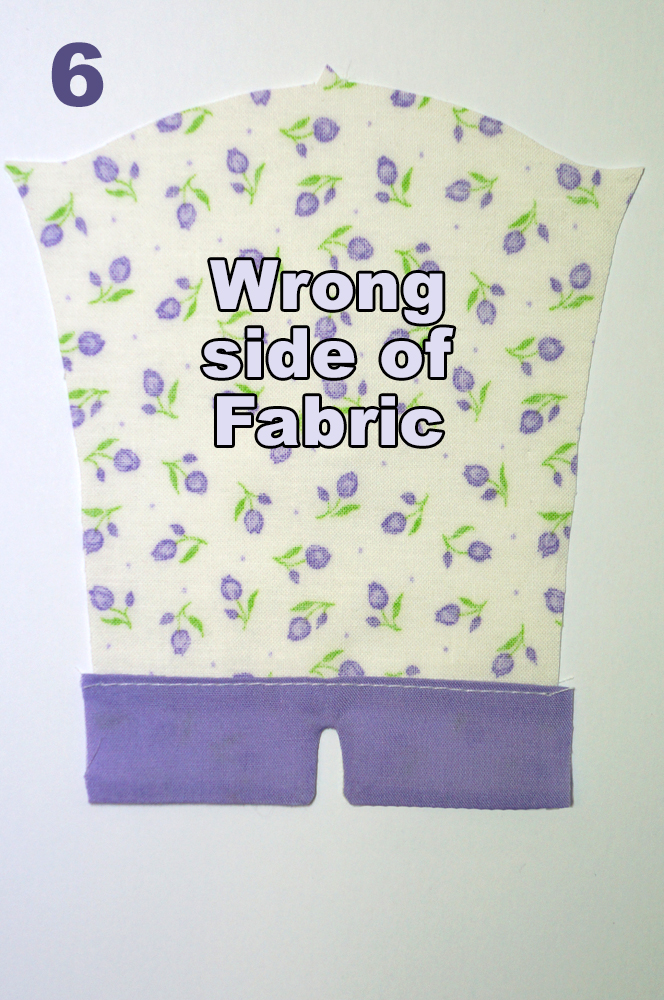
Photo 5: The flip-side of photo 4.
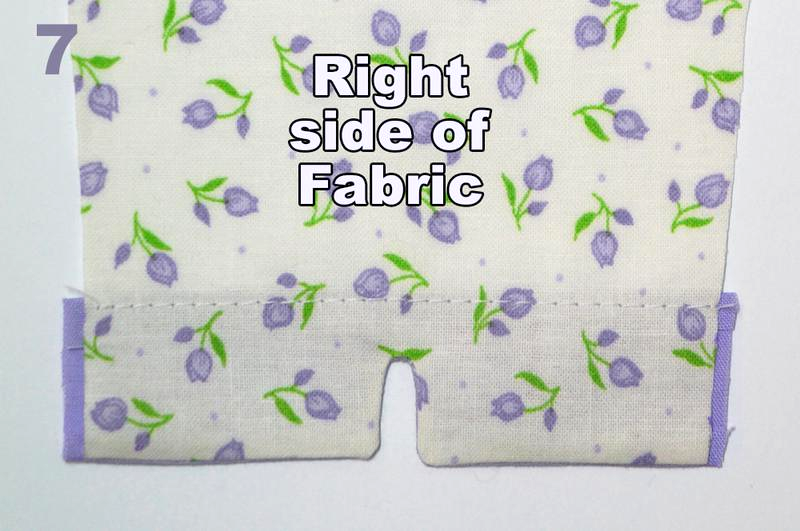
Photo 6: Topstitch close to the edge to finish stitching the cuff.
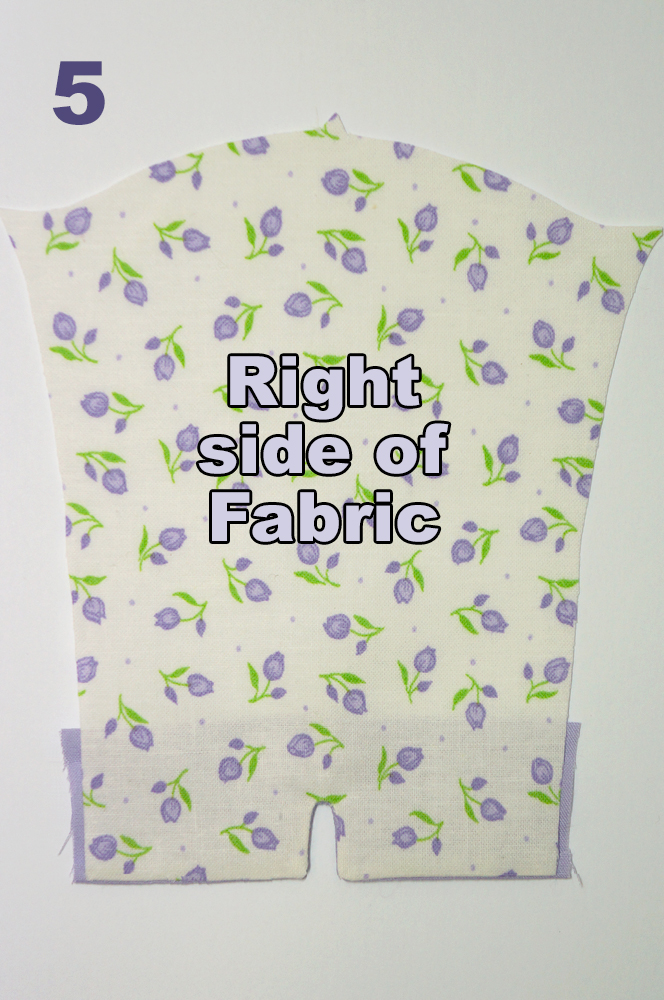
Photo 7: This is the flip side of photo 6. Flip the cuff upwards so the edge is right above the stitches.
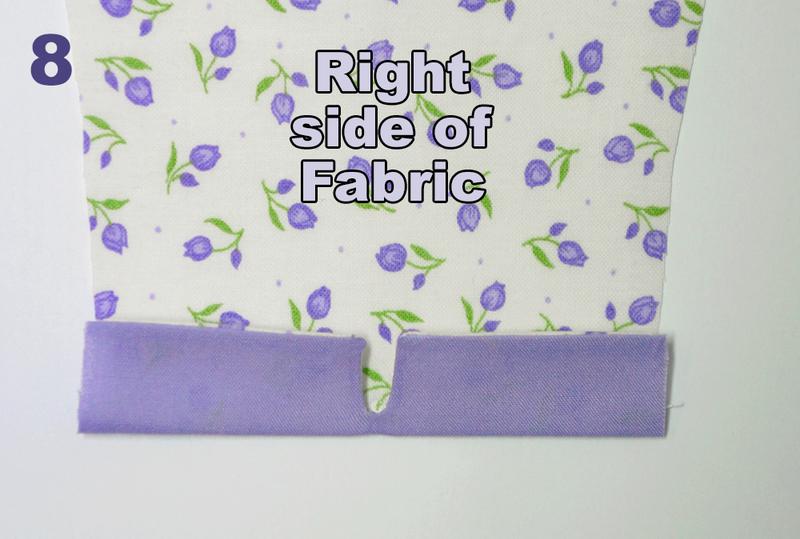
Photo 8: Once the cuff is turned upwards, press to set the crease. If you are going to add embroidery, beads, studs, sequins, etc, this is the time. The seam allowance is 1/4" so don't decorate the edge that will be turned inwards when you sew the seam.
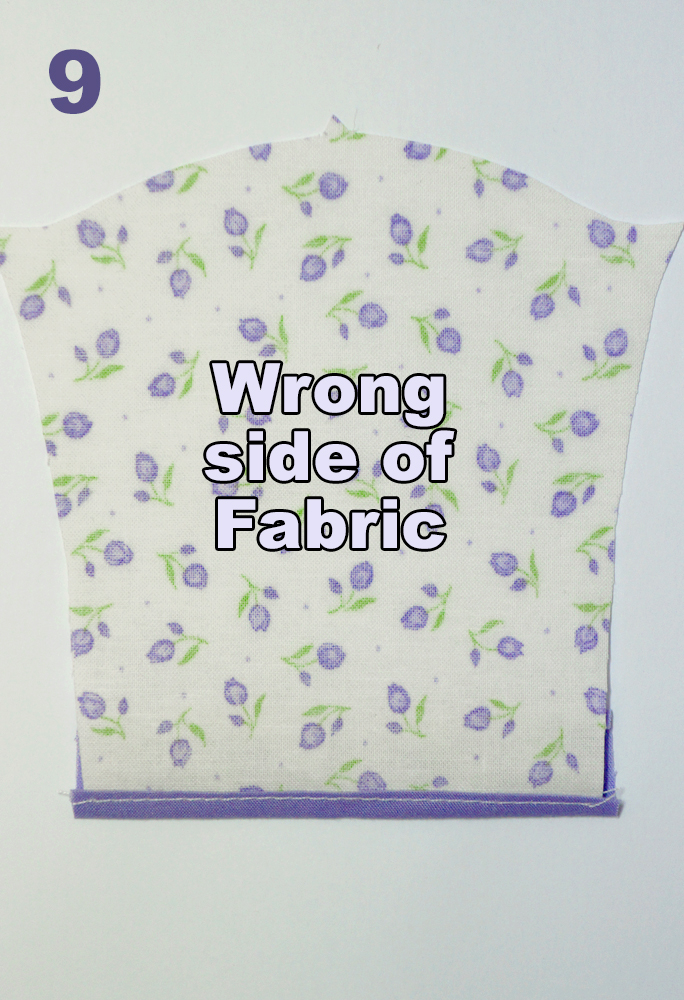
Photo 9: This is the flip side of photo 8. The cuff looks better when you fold it up with part of the cuff inside the sleeve.
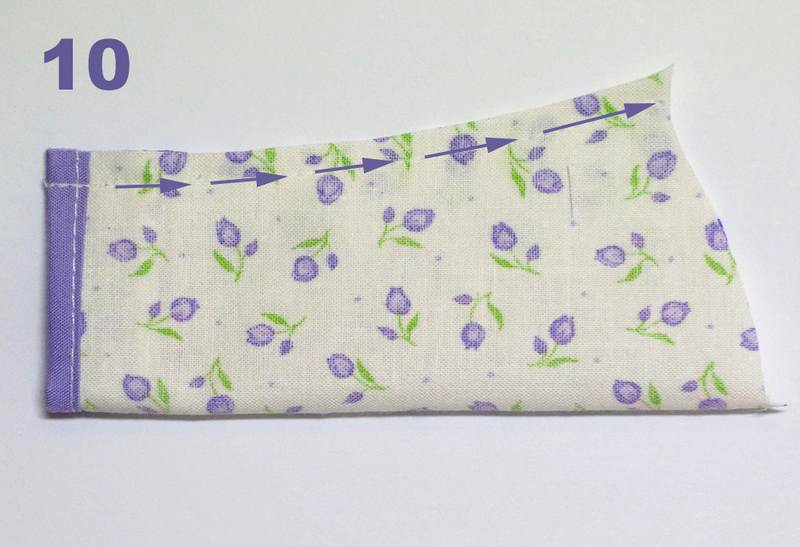
Photo 10: If I was sewing a real piece, the sleeves would be attached to the rest of the garment for this step, but for the tutorial, it's just a sleeve. Turn the sleeve right sides facing, sandwiching the cuff as shown. Try to keep the edges of the cuff from slipping when you sew the seam. The seam allowance is 1/4"
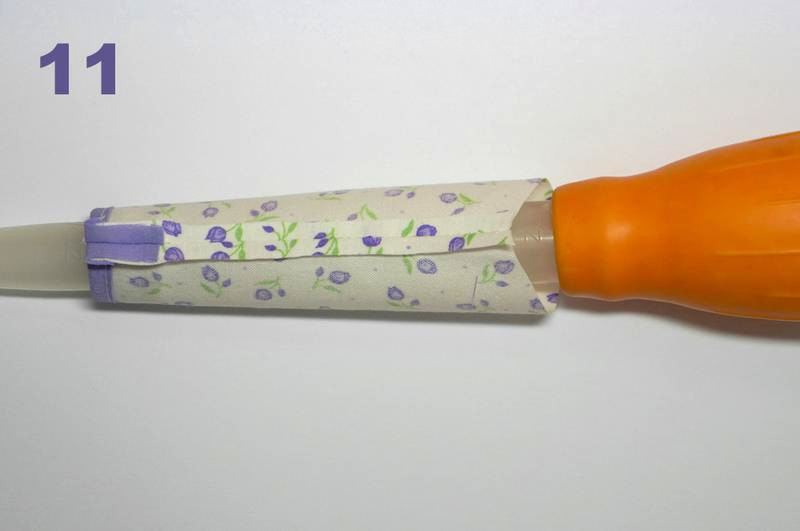
Photo 11: Everyone has a turkey baster in their sewing kit, right? I use mine to iron tubular shapes like sleeves and trouser legs. This cuff would look nice on the bottom of dolly trousers too.
Photo 12: Put a bit of glue under the raw edges and clamp. Let it thoroughly dry.
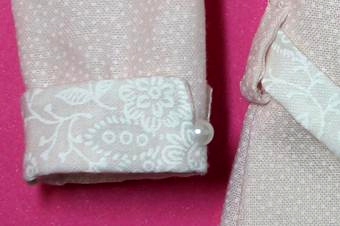
Photo 13: Nicer than loose raw edges!
BEST VIEWED with your browser at the 100% setting :)

Website Designed for Silkspike Dolls using HOMESTEAD software.
Please do not use my photos or any portion of my website without asking permission.
Thanks! Micki :)
Page created July 1, 2020

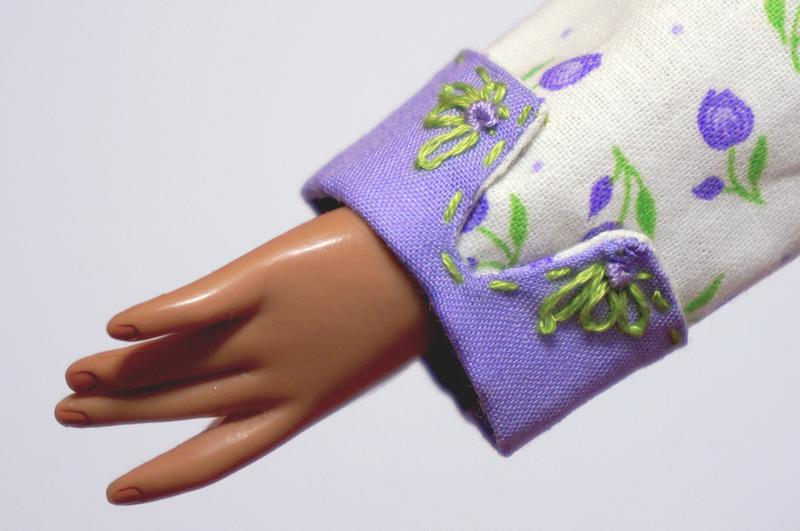
Embroidery is not my strong point, but you get the idea. :o)
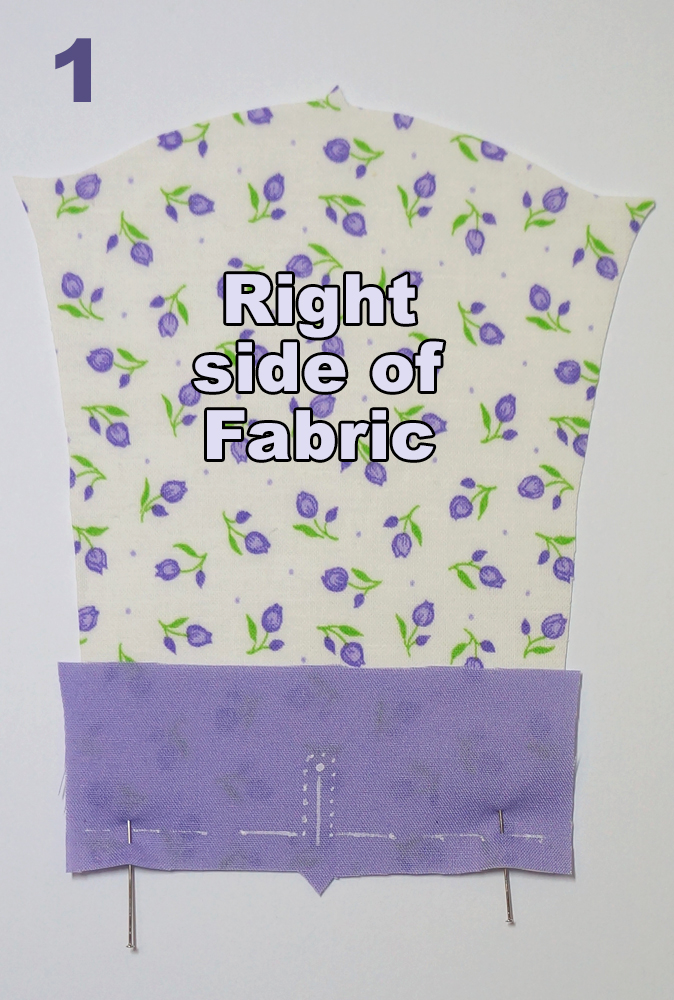
Photo 1: Cut the cuff on the straight grain. Cut as shown in photo. Pin right sides together, leaving a bit hanging off of each side.
Photo 2: Mark both cuffs as shown. The bottom seam allowance is 1/4" (approx 6mm). Use very small stitches going around the curve. You will have to manipulate the fabric after you turn it requiring some gentle tugging and finger-pressing. Your stitches need to hold.
Photo 3: Trim the cuff as shown in photo 3.