BEST VIEWED with your browser at the 100% setting :)

Website Designed for Silkspike Dolls using HOMESTEAD software.
Please do not use my photos or any portion of my website without asking permission.
Thanks! Micki :)

Lining Trousers or Capris (Pedal Pushers)
This is a companion tutorial that is free to anyone, but it was created for my capri pattern for Ellowyne or Antoinette. If you would like to purchase this pattern and instructions, please go to my Etsy Shop. (Registering for Etsy is FREE)
This tutorial is my own property. Please do not copy it without my permission, although you are most welcome to direct people to my website via forums or other means. Thank you!
This tutorial demonstrates lining a pair of capris, but you can use this method on full-length trousers/pants. My tutorial shows capris with pockets, but they are entirely optional.
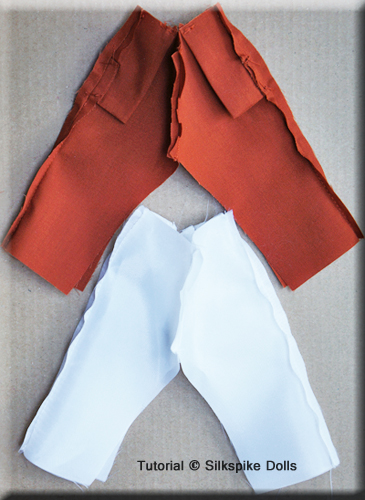
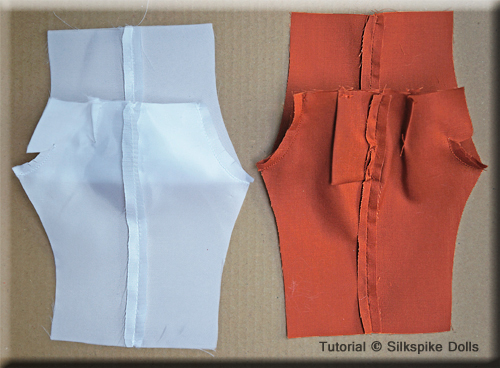
Complete the usual steps sewing the main body of the capris - the darts, the optional pockets and the side seams. Then sew the darts into your lining pieces and sew the side seams together. You can use a Serger to make your seams or finish them in any way you'd like, but it is OK to leave the seams raw since they are completely encased once the item is finished.
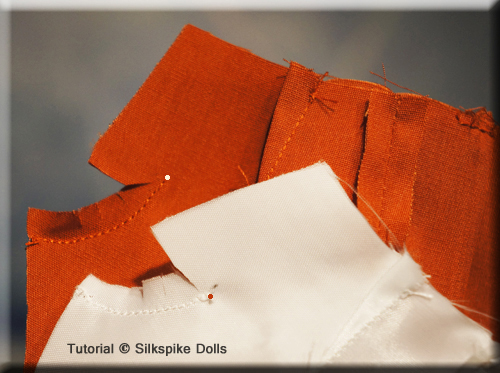
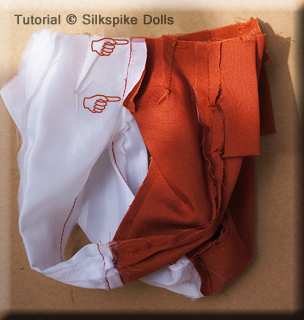
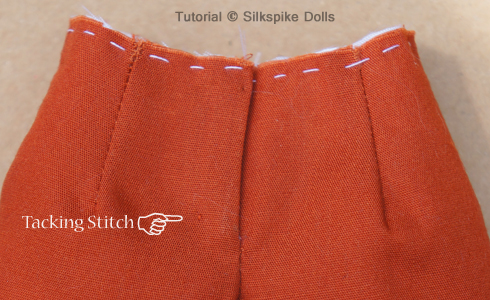
Use your steam iron to bust open the side seams and press the darts flat towards the back seam. Lay out your pieces as shown in the photo.
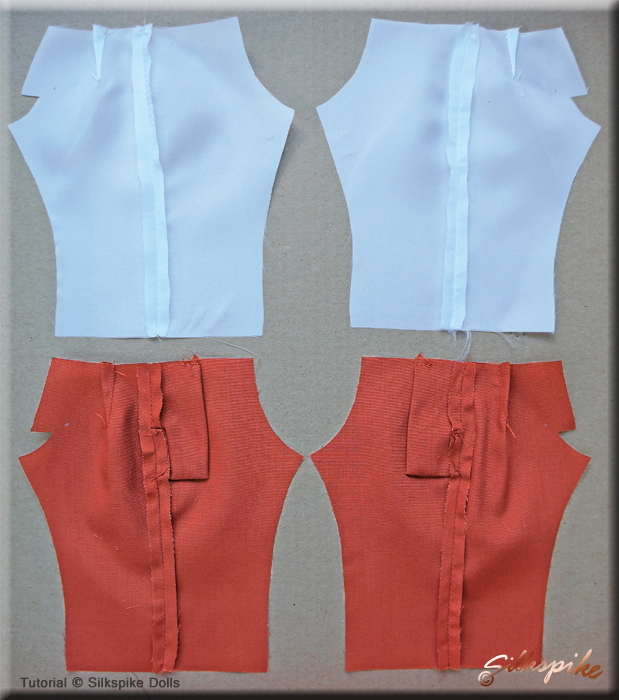
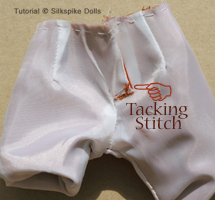
If you have opted for pockets, it is advisable to put a couple of small tacking stitches as shown in the photo to your right. This will hold the seam down flat so it won't stick out at your doll's hips.
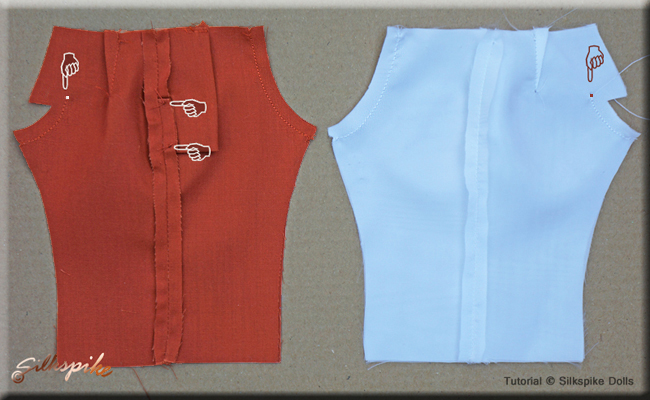
The next step is to put your main pieces together - right sides together. Do the same with the lining pieces.
Next sew a 1/4" seam along the front rise (crotch/crutch) of both your main piece as well as your lining. (figure A)
Then sew together the back rise of your main fabric (figure B), and the back rise of your lining (figure C), stopping at the mark on the pattern. Be sure to back-stitch a few times here or put in a good knot since this area will have to be sturdy. You do NOT want it to come loose.
Close-up Detail
D
E
Clip towards the pivot point on your main piece as shown in figure D. Do not cut too close to the stitching. Repeat with the lining piece as shown in Figure E. Don't worry about trimming the seam, but clip the curves as shown. Lightly press these seams open with your fingers or your iron.
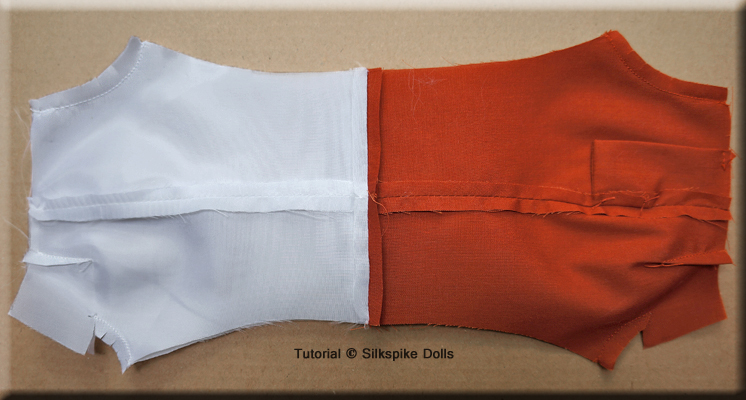
Then flip the lining piece right-side-out as shown in the photo to your right. This way you are inserting the lining that is right-side-out into the main body which is still wrong-side-out. Match up the two pieces until they fit together. You are now ready to sew the hems. This method will completely encase the hems; saving you the fiddly job of sewing them by hand.

A
B
B
A
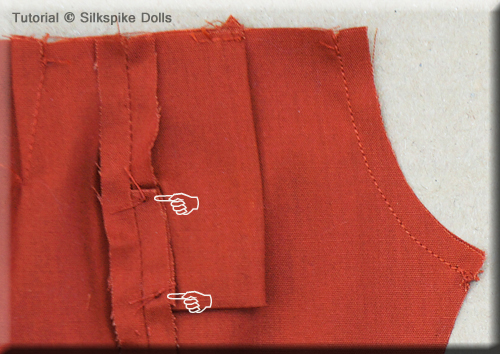
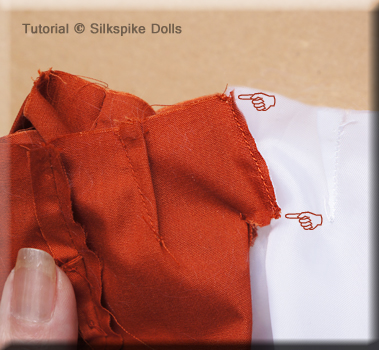
Next you will flip the capris again until they are in the position shown in the photo on your bottom left. Pin as shown, paying attention to lining up the seams indicated by the pointing fingers. It is important to keep these seams lined up perfectly. You also want to keep the seams spread open flat. Baste first if you are not confident about sewing between the pins. It doesn't really matter where you start, but I usually begin my first stitch at one of the hems. You may need to slightly stretch the fabric as you sew.

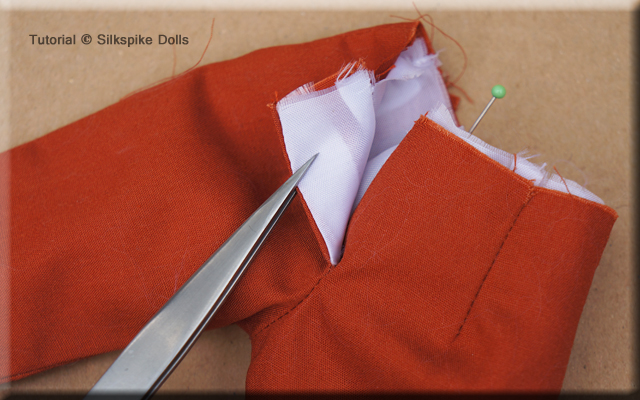
Your finished stitching will look something like the photo below. At this point, you can lightly press open those seams, which you may find a bit awkward. Refer my turkey baster pressing tip. Then cut just a few shallow clips into the curves to to keep in inseam from puckering once they are turned right-side-out
B
A
C
Turning and inserting the Lining
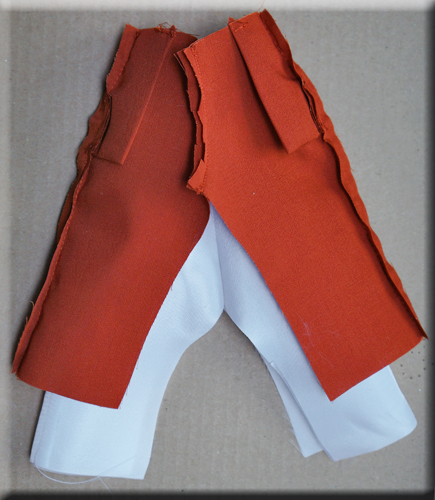
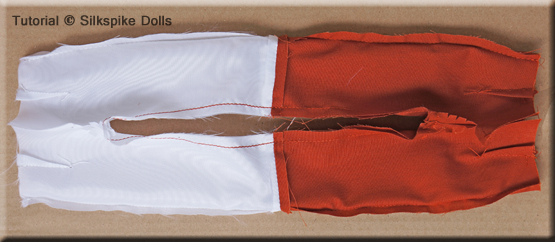
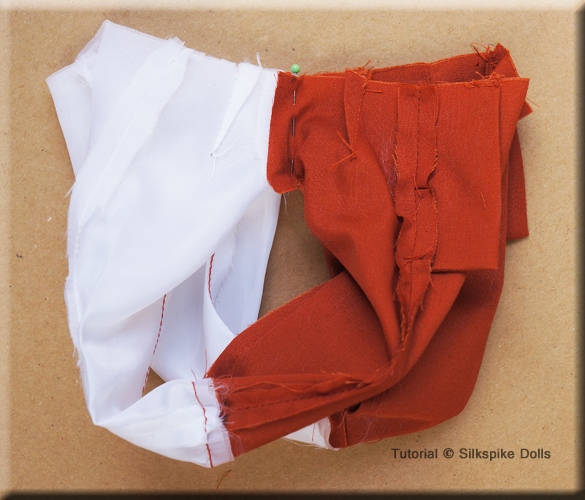
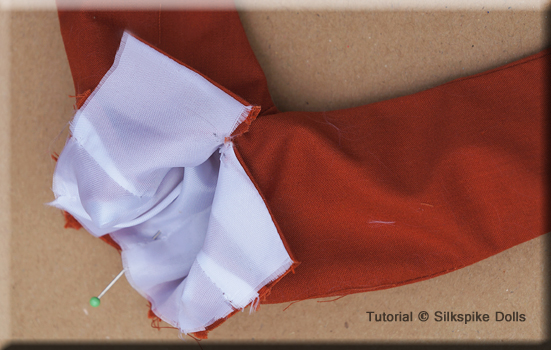
Once you are more experienced at this step, it is very easy. Simply pull both legs outwards and place your pieces as shown in the photo to your left. Then pull the pieces open by the side seams so they are in the position you see in the next photo.
Pin the bottom hems. Sew a straight seam from point A to point B that is 1/4 inch from the edge for each hem. Take care to insure that the side seams remain flat open as you sew. Make sure to carefully sew the hems the same because if one is more narrow than the other, they will not line up when you sew the inseam, or one leg may be longer than the other. When you have completed sewing your hems, pull the two pieces apart as shown in the photo below. Press each hem flat open as shown.

Sewing the back flaps
If you liked my tutorial, please go to my homepage and scroll to the bottom and click the link to my Guestbook and tell the world! Thank you. :o)
QUESTIONS?
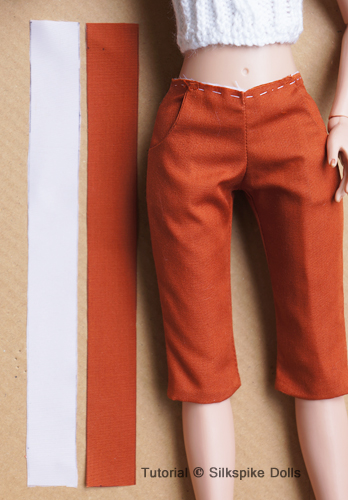
Sewing the waistband - Cut two strips - 1 each from main and lining 7-3/4" x 13/16" (19-1/2cm x 2cm) as shown
This seam will be a bit wider at the bottom than the top. This gives the back waist a little bit more shape. Be sure to give give it a good back-stitch at each end so it won't come loose. Once your seam is done, it should look like the photo to your right.
.
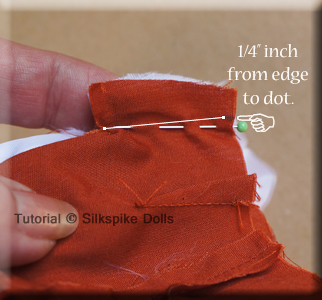
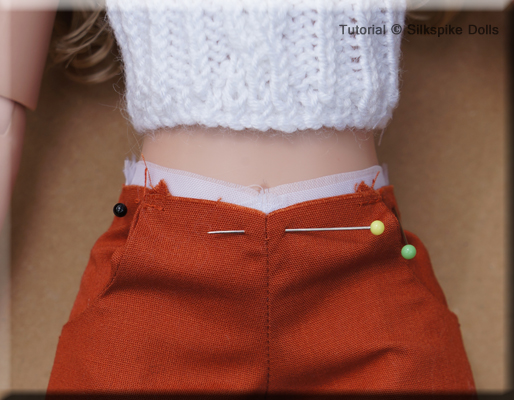
Put a mark on your flap exactly 1/4" from the edge and mark a dot (you can see my dot below the green pin-head). You are now going to position your main and lining together like you see in the photo to the far left. Then sew the seam from the inside corner of the L-shape to the dot as I have indicated in the photo to your left.
This seam will encase the lining for the flap that is on the left side of the doll when the garment is right-side-out.
Now flip your piece over, and sew the other sides together (right sides together). This time you will be sewing fairly close to the edge of this flap as shown in the photo to your right. This makes the seam that encases the lining for the under-flap that is on the right side of the doll when the garment is right-side-out.
It is time to turn your trousers by working the main fabric right side out over the top of the lining. You can see (in the photo to your right) how the flaps are now enclosed in the lining.
.
The bottom bit will have a raw edge. Mine is a bit frayed from handling it too much, but this is not a problem. It can be slightly trimmed and you can put a few hand stitches in it to make it neater if you want. You can even dab it with some fray check or clear nail polish; either of which will have to dry thoroughly before proceeding.
Manipulate the flaps so the left flap goes over the right flap as shown in the photo
below. Give them a little press with your iron. You can sew small tacking stitch at
the bottom, but try to keep it invisible on the outside of the trousers.
You will have a little flash of your main fabric turned under at the hem; no more than a scant 1/8 inch is enough. I left a little bit of the lining showing in the photo so you could see they are lined, but your finished article should have no lining showing.
You will want to encourage ALL of the seams to stay open and butt up against each other (wrong-sides-together) so there won't be any bulky/bumpy areas along the seams. A dull knitting needle is helpful in turning and manipulating, especially with long trousers.
Once you are happy with how they look, press the legs and hems so they look crisp and neat and no lining is showing at the hem. It is now time to try them on your doll and begin to work on the waistband.
You will have a small bit of the lining that needs to be trimmed. At this point, it's good to first baste the lining to the main fabric at the top edge - then trim. You are completely set to add your waistband at this point.
Sewing the inseam in the round

This part is a bit tricky, but just take your time and follow the photos. It is easy once you have done it once. This method is not ideal when you are making shorts. I will have a pattern and tutorial available for shorts at a future date.
If you'd rather not try the next few steps, you can opt to turn your trousers right side out by turning the main side over the lining and gently shaping the pieces to lie flat against each other. Then flip the edges of the back flaps in on themselves and stitch them together. It takes longer, but you get the desired result.
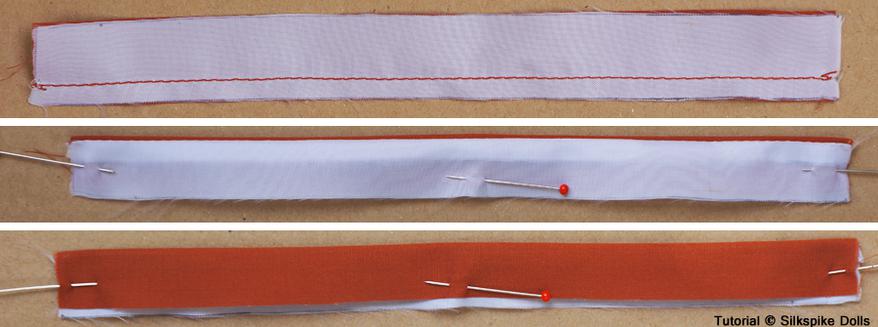
I put my basting stitches close to the edge so there will be no chance of them showing on the finished item. Cut your waistband pieces and you are ready to proceed.
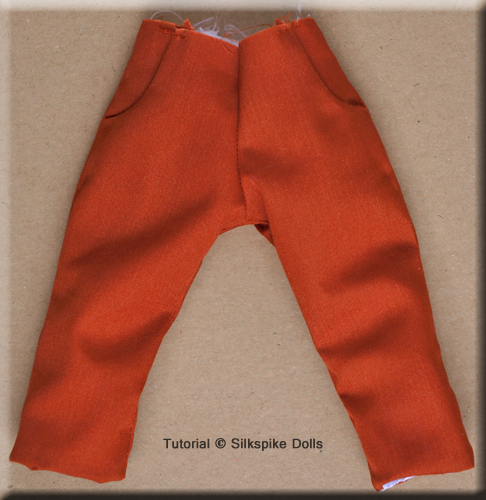
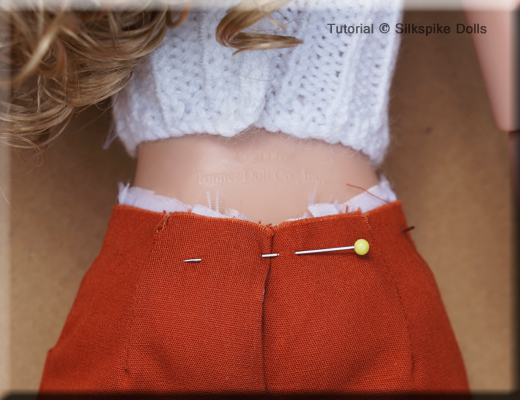
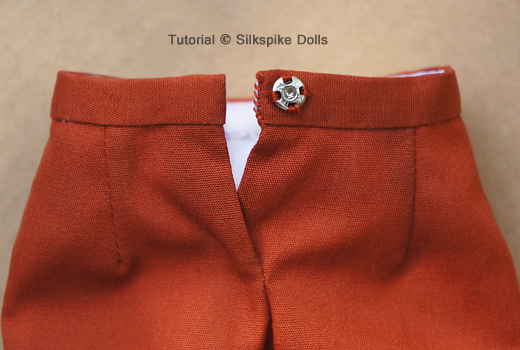
The back of your capris should look like the photo to the right. The back opening should match up. I've pointed out my tacking stitch. This helps to keep the bottom of the flap tidy.
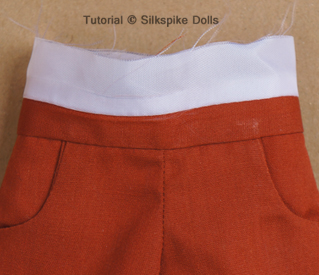
Sew your two waistband pieces together, then flip them to right sides out. Press them so a little flash of the main fabric shows above the lining as shown in the second photo below.
When you flip it back over, you will have a small flash of white. Trim this bit away, keeping it nice and straight as you cut.
Now you are ready to attach the waistband!


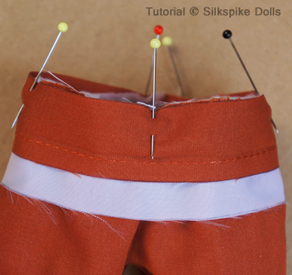
Pin your waistband to your main body, right-sides-together. Leave a little over a 1/4" hanging off each side, because they will be turned under in a later step. I made the waistband length a little bit too long, so be generous since it is easier to trim some off than to run short. Re-postion it and pin it again until you feel you have enough to work with on each side. Check the width of your waistband. You want it to be the same height left and right.
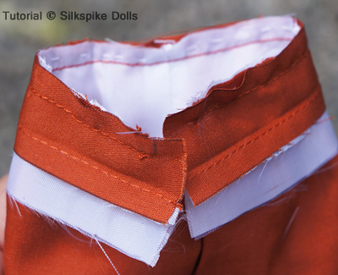
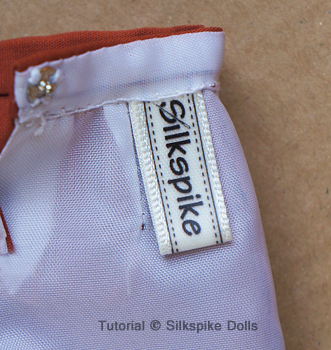
Next pin back your flaps as shown. Trim any excess but leave no less than 1/4" to turn in and under. Think of the corners like wrapping a gift; neatly tuck everything, trimming as needed. I normally hand-stitch the lining down, each stitch catching a bit of the lining and seam that attaches the waistband to the main body. If you are stitching with a contrasting colour, be sure you don't catch any of the front main fabric in your stitches, or they will show. I like to sew my label into the waistband, but you can put it anywhere you'd like along the way with this project.
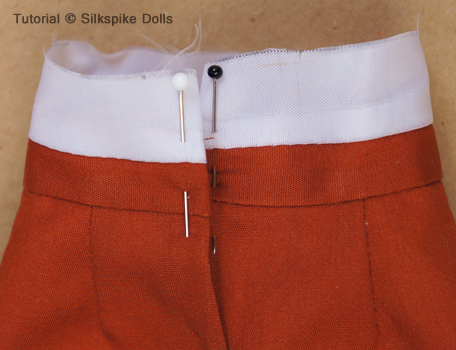
I sewed the top snap first and didn't catch any of the main fabric when I stitched it, which makes a neat job of it, but don't stress if you'd rather go through all layers. Then line up the waistband pieces and push the top snap as hard as you can against the bottom fabric which leaves an indentation. Mark this little dent and that is where you sew the exact middle of the other half of your snap.

Try them on your doll and give yourself a big pat on the back!
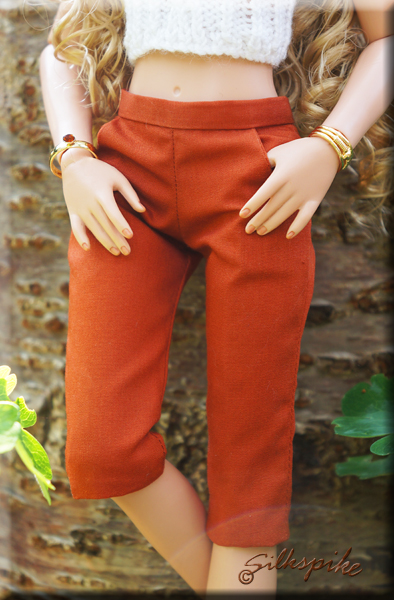
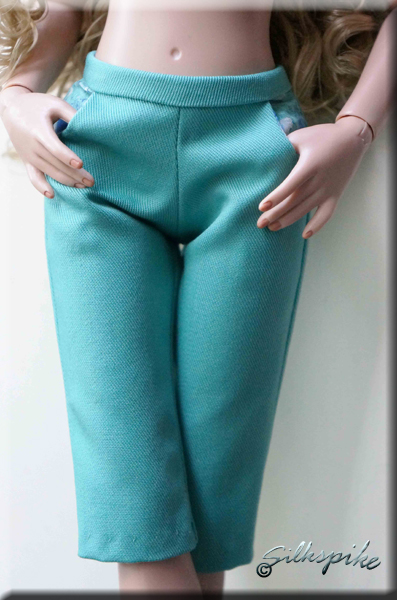
The capris on your left are now completely lined! The capris on your right are not lined. Both are made from the same pattern with one exception. The orange capris were made with a waistband cut on the straight grain of the fabric and the aqua capris are made with a waistband that was cut on the bias. I do prefer to cut my waistbands on the bias because it makes a nicer shape.
These capris are designed to be snug. Another thing to keep in mind about the lined capris, is that they will be just a tiny bit tighter than the unlined ones because of the extra bit of fabric inside, so unless you want to slightly enlarge the pattern, it is best to use thin acetate lining - the kind that makes a slight swishy sound. It is easier to work with than the really shiny lining. Either one unravels fairly easily, so handle your lining gently and don't stretch it any more than you have to.
I hope you enjoyed using my tutorial.
PAGE PUBLISHED
23 JULY, 2014